Link to Outlook Desktop Client Instructions
Link to Outlook Web Client Instructions
Outlook Desktop Client
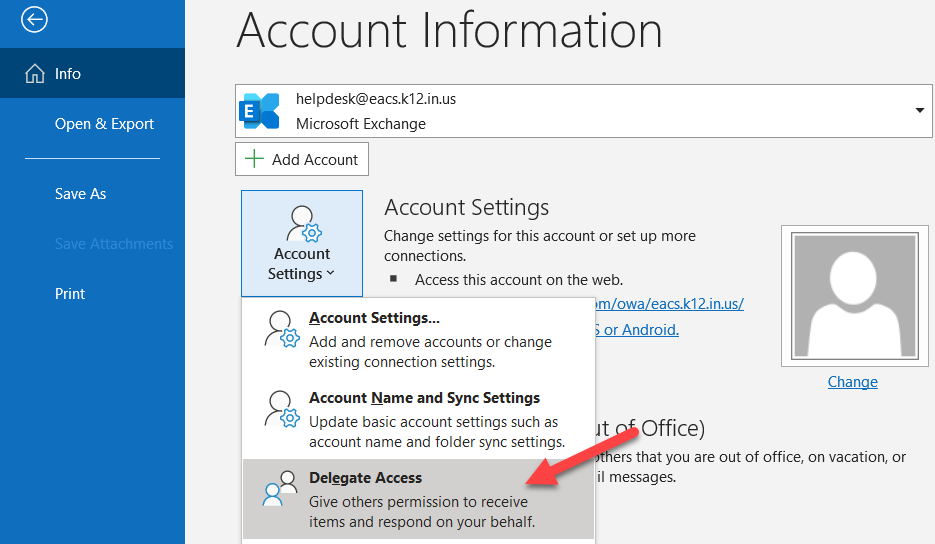
- Click "File"
- Click "Account Settings"
- Click "Delegate Access"
- Click "Add..."

- Type in the name of the person or group that you want to give proxy access to
- Highlight the name or group that you want to give access to and then click the "Add" button
- Repeat Steps 5 and 6 if there are multiple people or groups that you want to give the same level of access to
- Click "OK"
- Select the level of permissions that you want to assign
- You can give access to the following areas
- Calendar
- Tasks
- Inbox
- Contacts
- Notes
- You can give the following level of permissions to any of the above areas
- None
- Reviewer (can read items)
- Author (can read and create items)
- Editor (can read, create, and modify items)
- You can give access to the following areas
- It is recommended that you check the "Automatically send a message to delegate summarizing these permissions"
- Click "OK" to the Delegate Permissions window
- Click "OK" to the Delegates window

Outlook Web Client
You can not assign proxy rights through the web client.